Verify domain ownership
The first step for all four services. Publish one TXT record to prove you own the domain, and find out where your domain comes from.
All four services start with exactly one thing: proving you own the domain with one TXT record. Only then do you get each service's own configuration records.
Before you verify
- Permission to edit DNS records for the domain
- An administrator account on the CloudFly console
Where your domain comes from
| Service | Where the domain comes from | Can you add one |
|---|---|---|
| Email Business | You give it when you sign up; CloudFly creates it | No |
| Email Security | You give it when you sign up; CloudFly creates it | No |
| Email API | You add it yourself in the console | Yes, within your plan's limit |
| Email Relay | You add it yourself in the console | Yes, within your plan's limit |
- Email Business and Email Security — the page has no add button. An empty page is not something you did wrong; contact support to have it configured.
- Email API and Email Relay — click + Add domain, type the domain, click Add. One domain works for both services.
Open the domain page
| Service | Console section |
|---|---|
| Email Business | Domains |
| Email Security | Routing configuration |
| Email API | Sending domains |
| Email Relay | Sending domains |
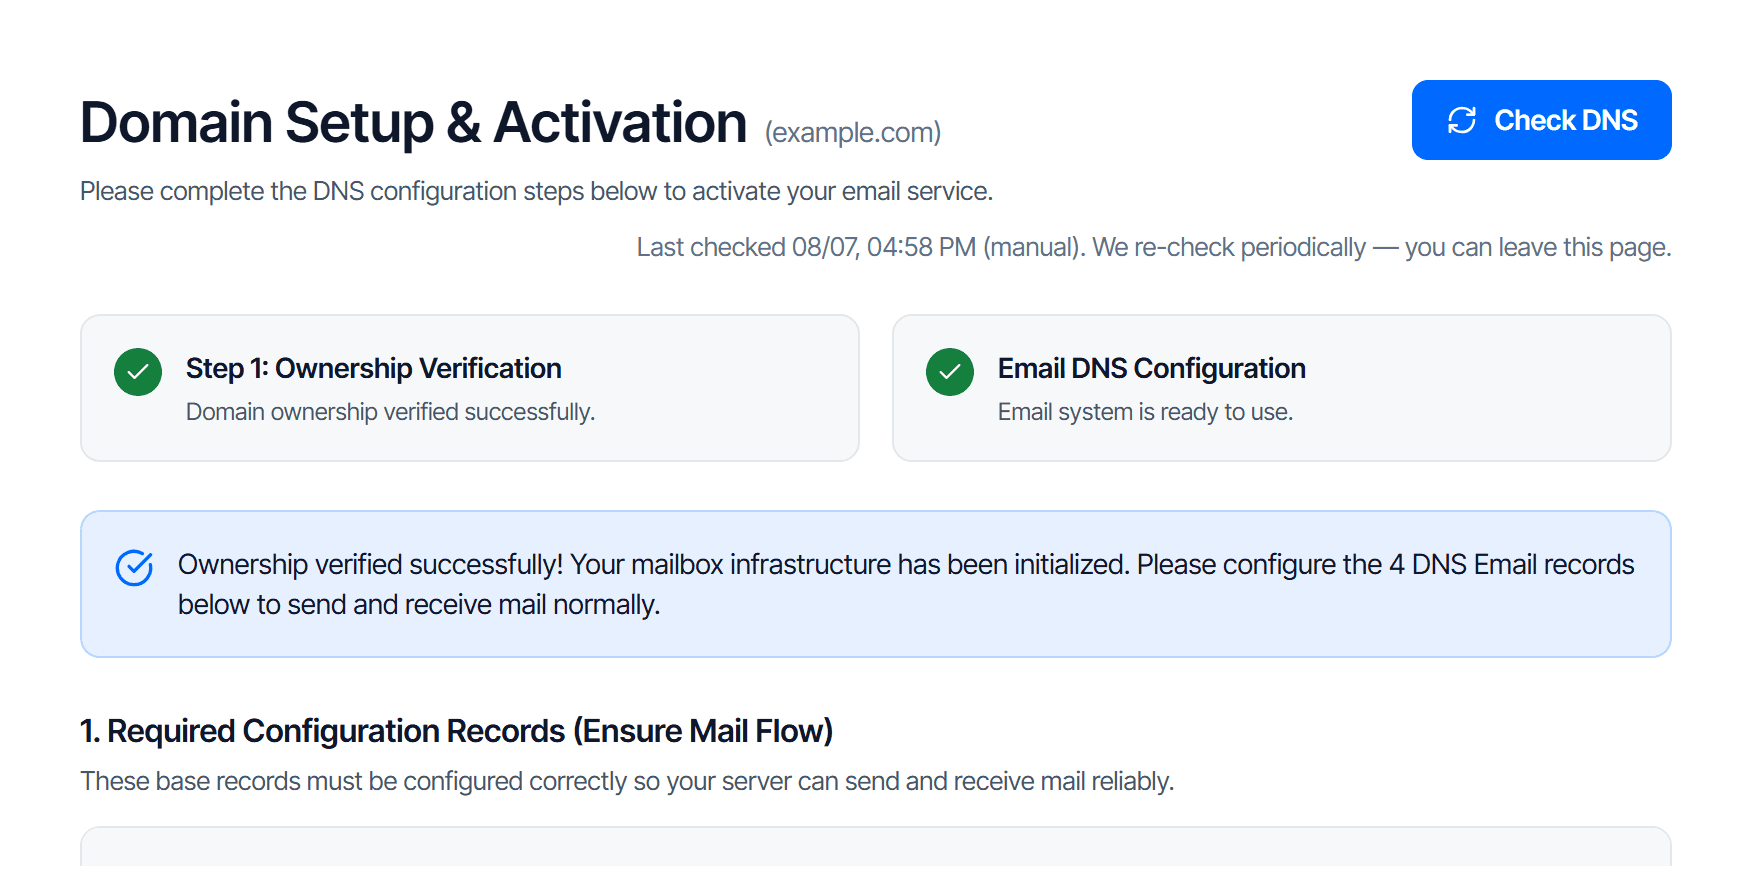
All four pages follow the same two-step frame:
| Item | Step 1 | Step 2 |
|---|---|---|
| What you do | Verify domain ownership | Publish the service's configuration records |
| Button | Verify ownership | Check DNS |
This page covers step 1. For step 2, see the last section.
Publish the TXT record
Copy the token
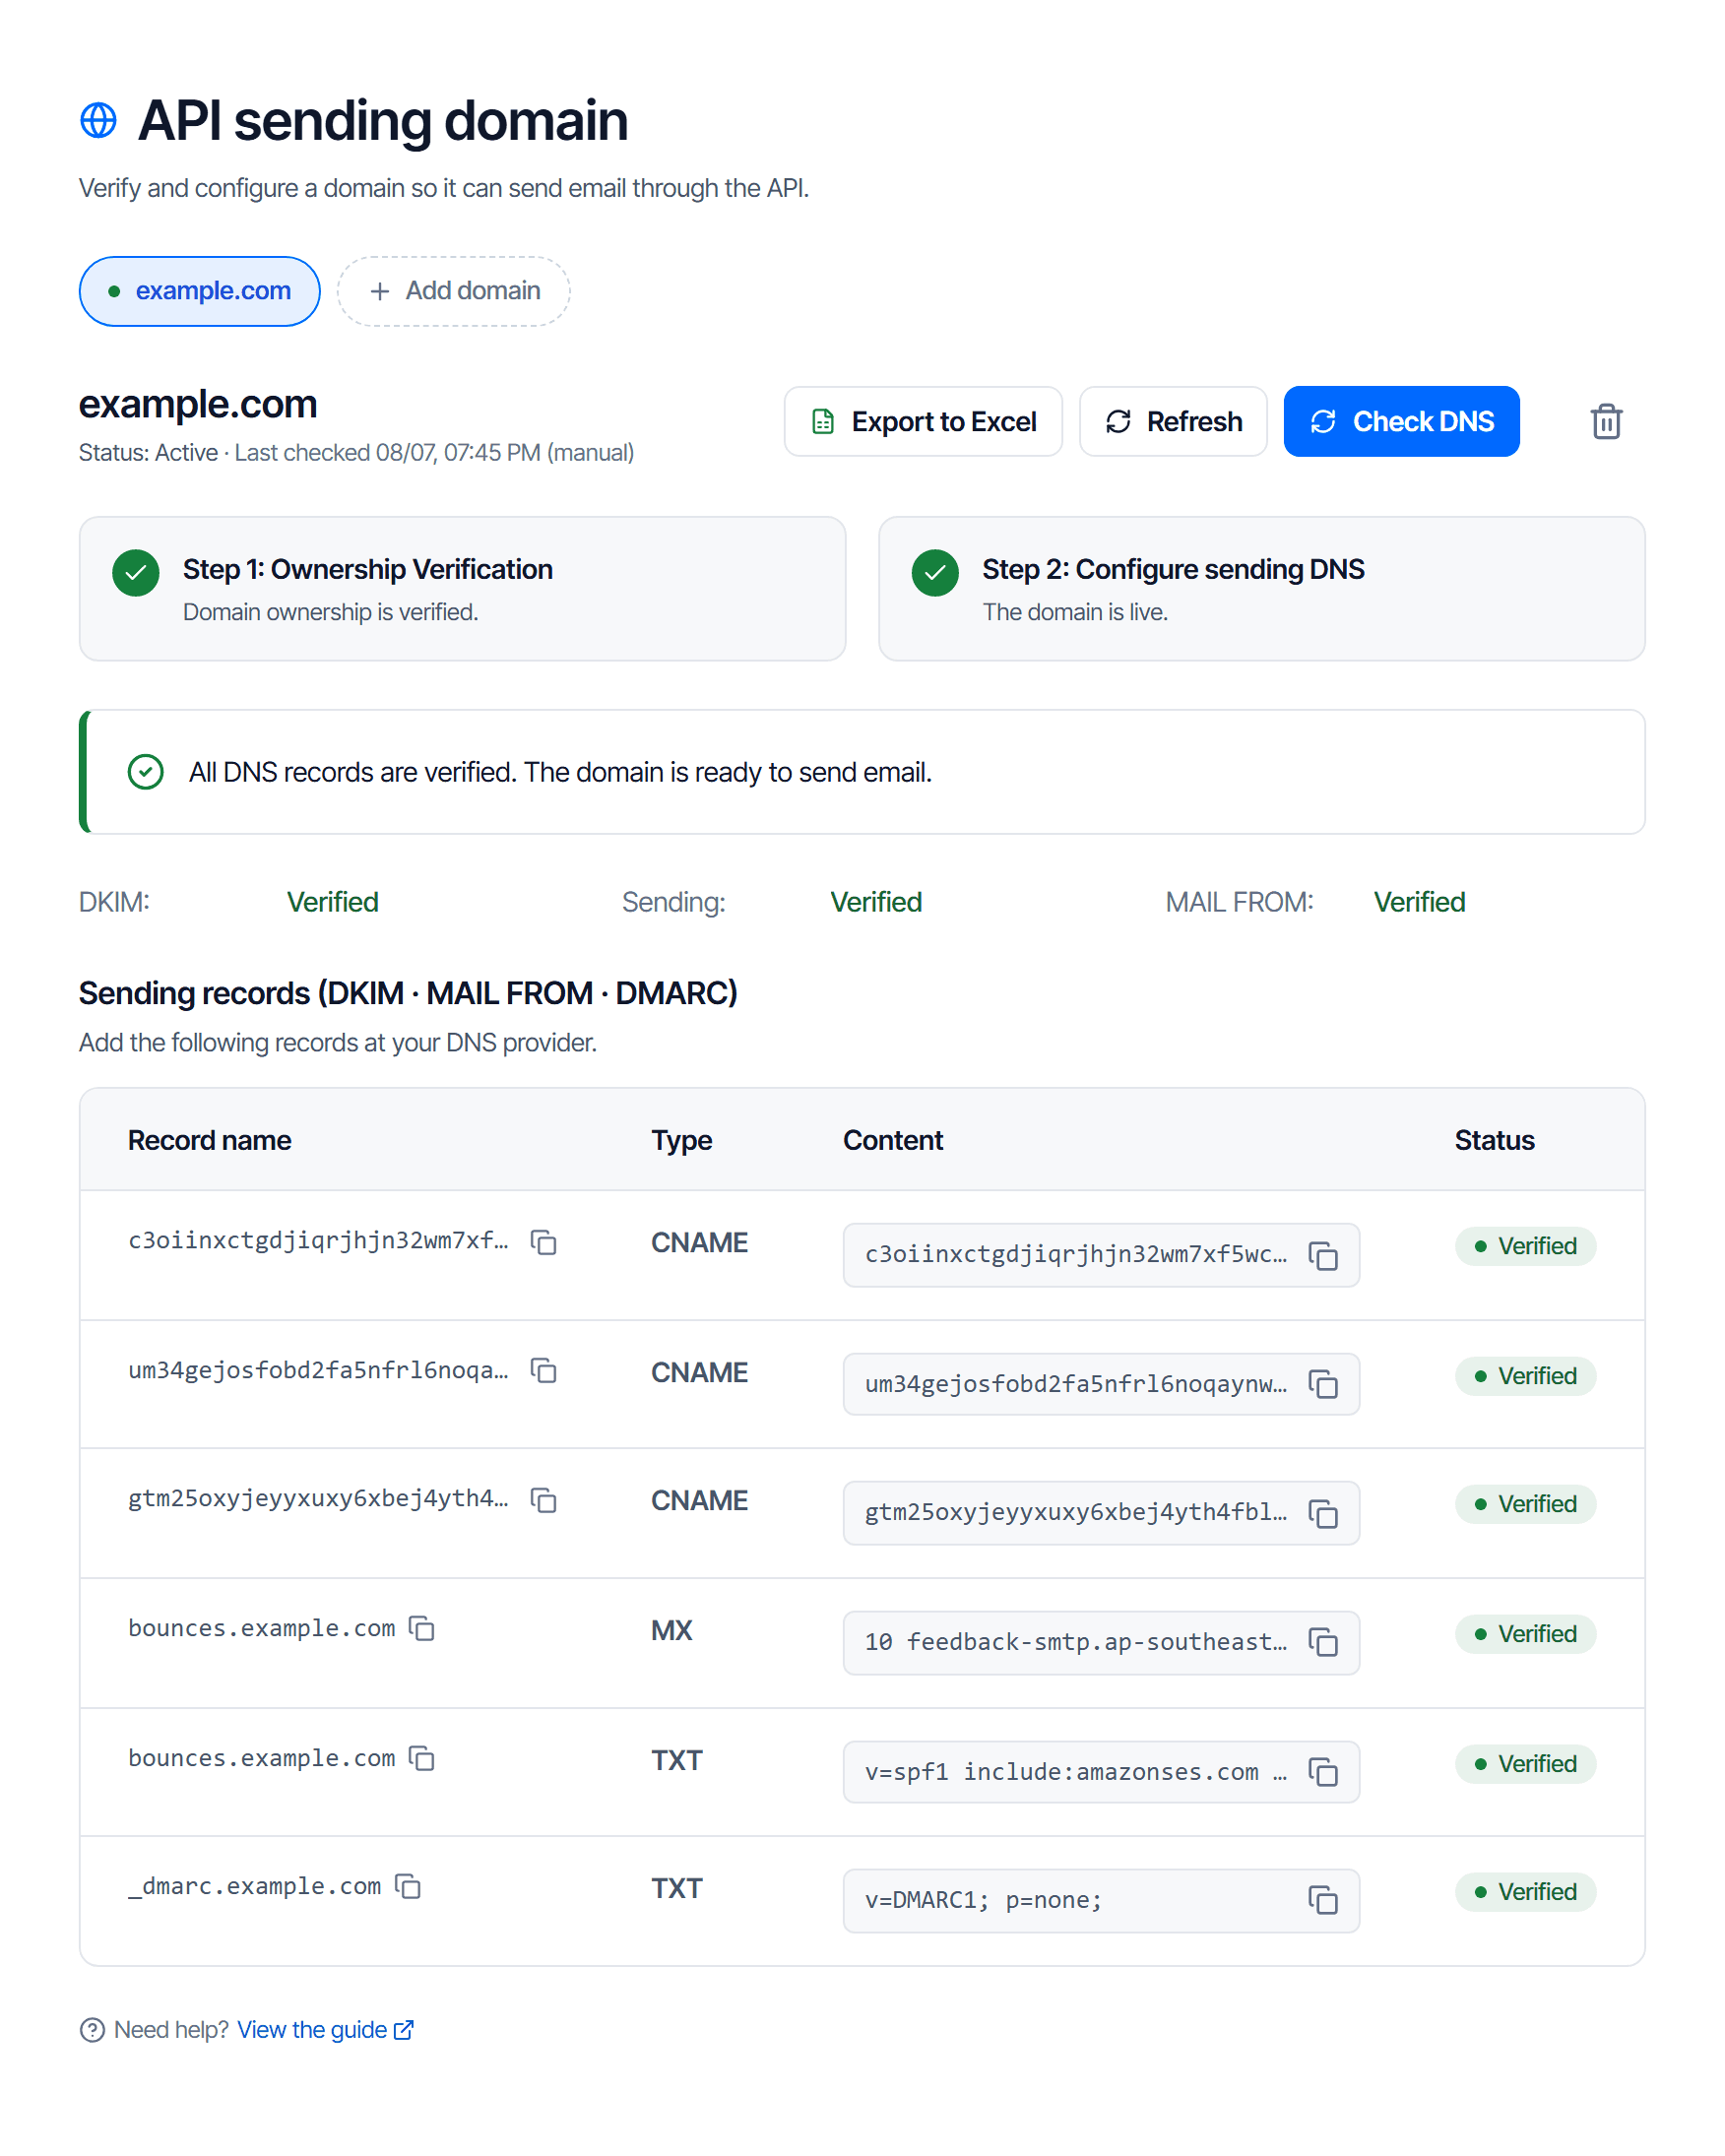
The picture is taken in Email API, hence the + Add domain button; the record table is identical across all four services.
Use the copy button in the Content cell, do not retype: the token is long, case-sensitive, and one wrong character still produces "record not found".
Pending check means the platform is waiting, not an error.
Create the record at your DNS provider
This record is identical across all four services.
| Field | Value |
|---|---|
| Type | TXT |
| Name / Host | _cloudfly |
| Value | cloudfly-verify=<token copied from the console> |
| TTL | leave at default |
Because it is shared, this record stays valid when you enable another service on the same domain — do not delete it.
Check the Name / Host field
Every DNS provider handles this field differently.
The record must sit at _cloudfly.example.com, not _cloudfly.example.com.example.com. If the
field appends the domain for you, enter only _cloudfly; if not, enter the full name.
Wait for the check
Check your work
In the console
Verification is done when all three of these appear together:
- The Step 1: Verify ownership card turns green
- The step 2 record table appears below it — that table only appears once infrastructure has been provisioned, so seeing it means this step is certainly complete
- The Last checked line shows a recent time
From your own machine
dig +short TXT _cloudfly.example.com
dig +short TXT _cloudfly.example.com @8.8.8.8
Both must return a cloudfly-verify=... string matching the console. If only the first returns a
result, the record has not reached public DNS servers yet.
When the check reports nothing found
Match what dig returns against the table below.
dig returns | Cause | Fix |
|---|---|---|
| Nothing | The record was not saved, or was saved on the wrong domain | Check your DNS control panel |
| A string different from the console | An old record left over from an earlier attempt — with several _cloudfly records at once the check cannot tell which to trust | Delete the extra one |
| The right value, but the console still reports nothing | Intermediate DNS resolvers still hold the old record in cache | Wait out the previous record's TTL and check again |
Keep the TXT record after verification
The platform re-checks on a schedule. A domain that loses its verification record can be returned to the pending state, and the services on it stop working.
Next step
| Service | What step 2 publishes | Guide |
|---|---|---|
| Email Business | MX, SPF, DKIM, DMARC — receive and send on CloudFly infrastructure | Publish the four mail DNS records |
| Email Security | MX only — inbound mail goes through the filter, then on to your own server | Point MX through the filtering gateway |
| Email API | Signing records and a feedback path — sending only | Publish the sending domain records |
| Email Relay | The same records as Email API, but added and activated separately | Publish the relay sending domain records |
Only Email Business points your root MX at CloudFly
Email Security also changes MX, but the destination is the filtering gateway and mail continues on to your own mail server. Email API and Email Relay never touch your root MX — they only send; your mailboxes stay exactly where they are.
CloudFly VMail Docs
User guides for CloudFly VMail — two separate sections, one for whoever administers the company email services, one for whoever just uses a mailbox.
Read the Overview
Tell account-wide figures apart from per-domain ones, read the date range correctly, and understand why every number might be zero.