Publish the sending domain records
Add a sending domain for Email API then publish the signing and feedback records, without touching the mailboxes you already use.
A domain clears two steps before you can send: proving you own it, then publishing the signing records. This is step two.
Before you start
- Domain ownership verified — that is step 1; this page is step 2
- Rights to edit the domain's DNS
Add a sending domain
Unlike Email Business and Email Security, you add the domain yourself here.
Go to Email API → Sending domains and click + Add domain at the end of the row. How many you can add depends on your plan.
It does not touch your existing mailboxes
Email API only sends. This record set contains no MX record on the root domain, so mail sent to your domain still goes where it always did.
The MX record in the table is on a subdomain, not your root domain
It is dedicated to the feedback path. Read the record-name column carefully before publishing — putting that MX on the root domain loses all your incoming mail.
Publish the records
Once ownership is verified the step 2 record table appears, generated for your domain.
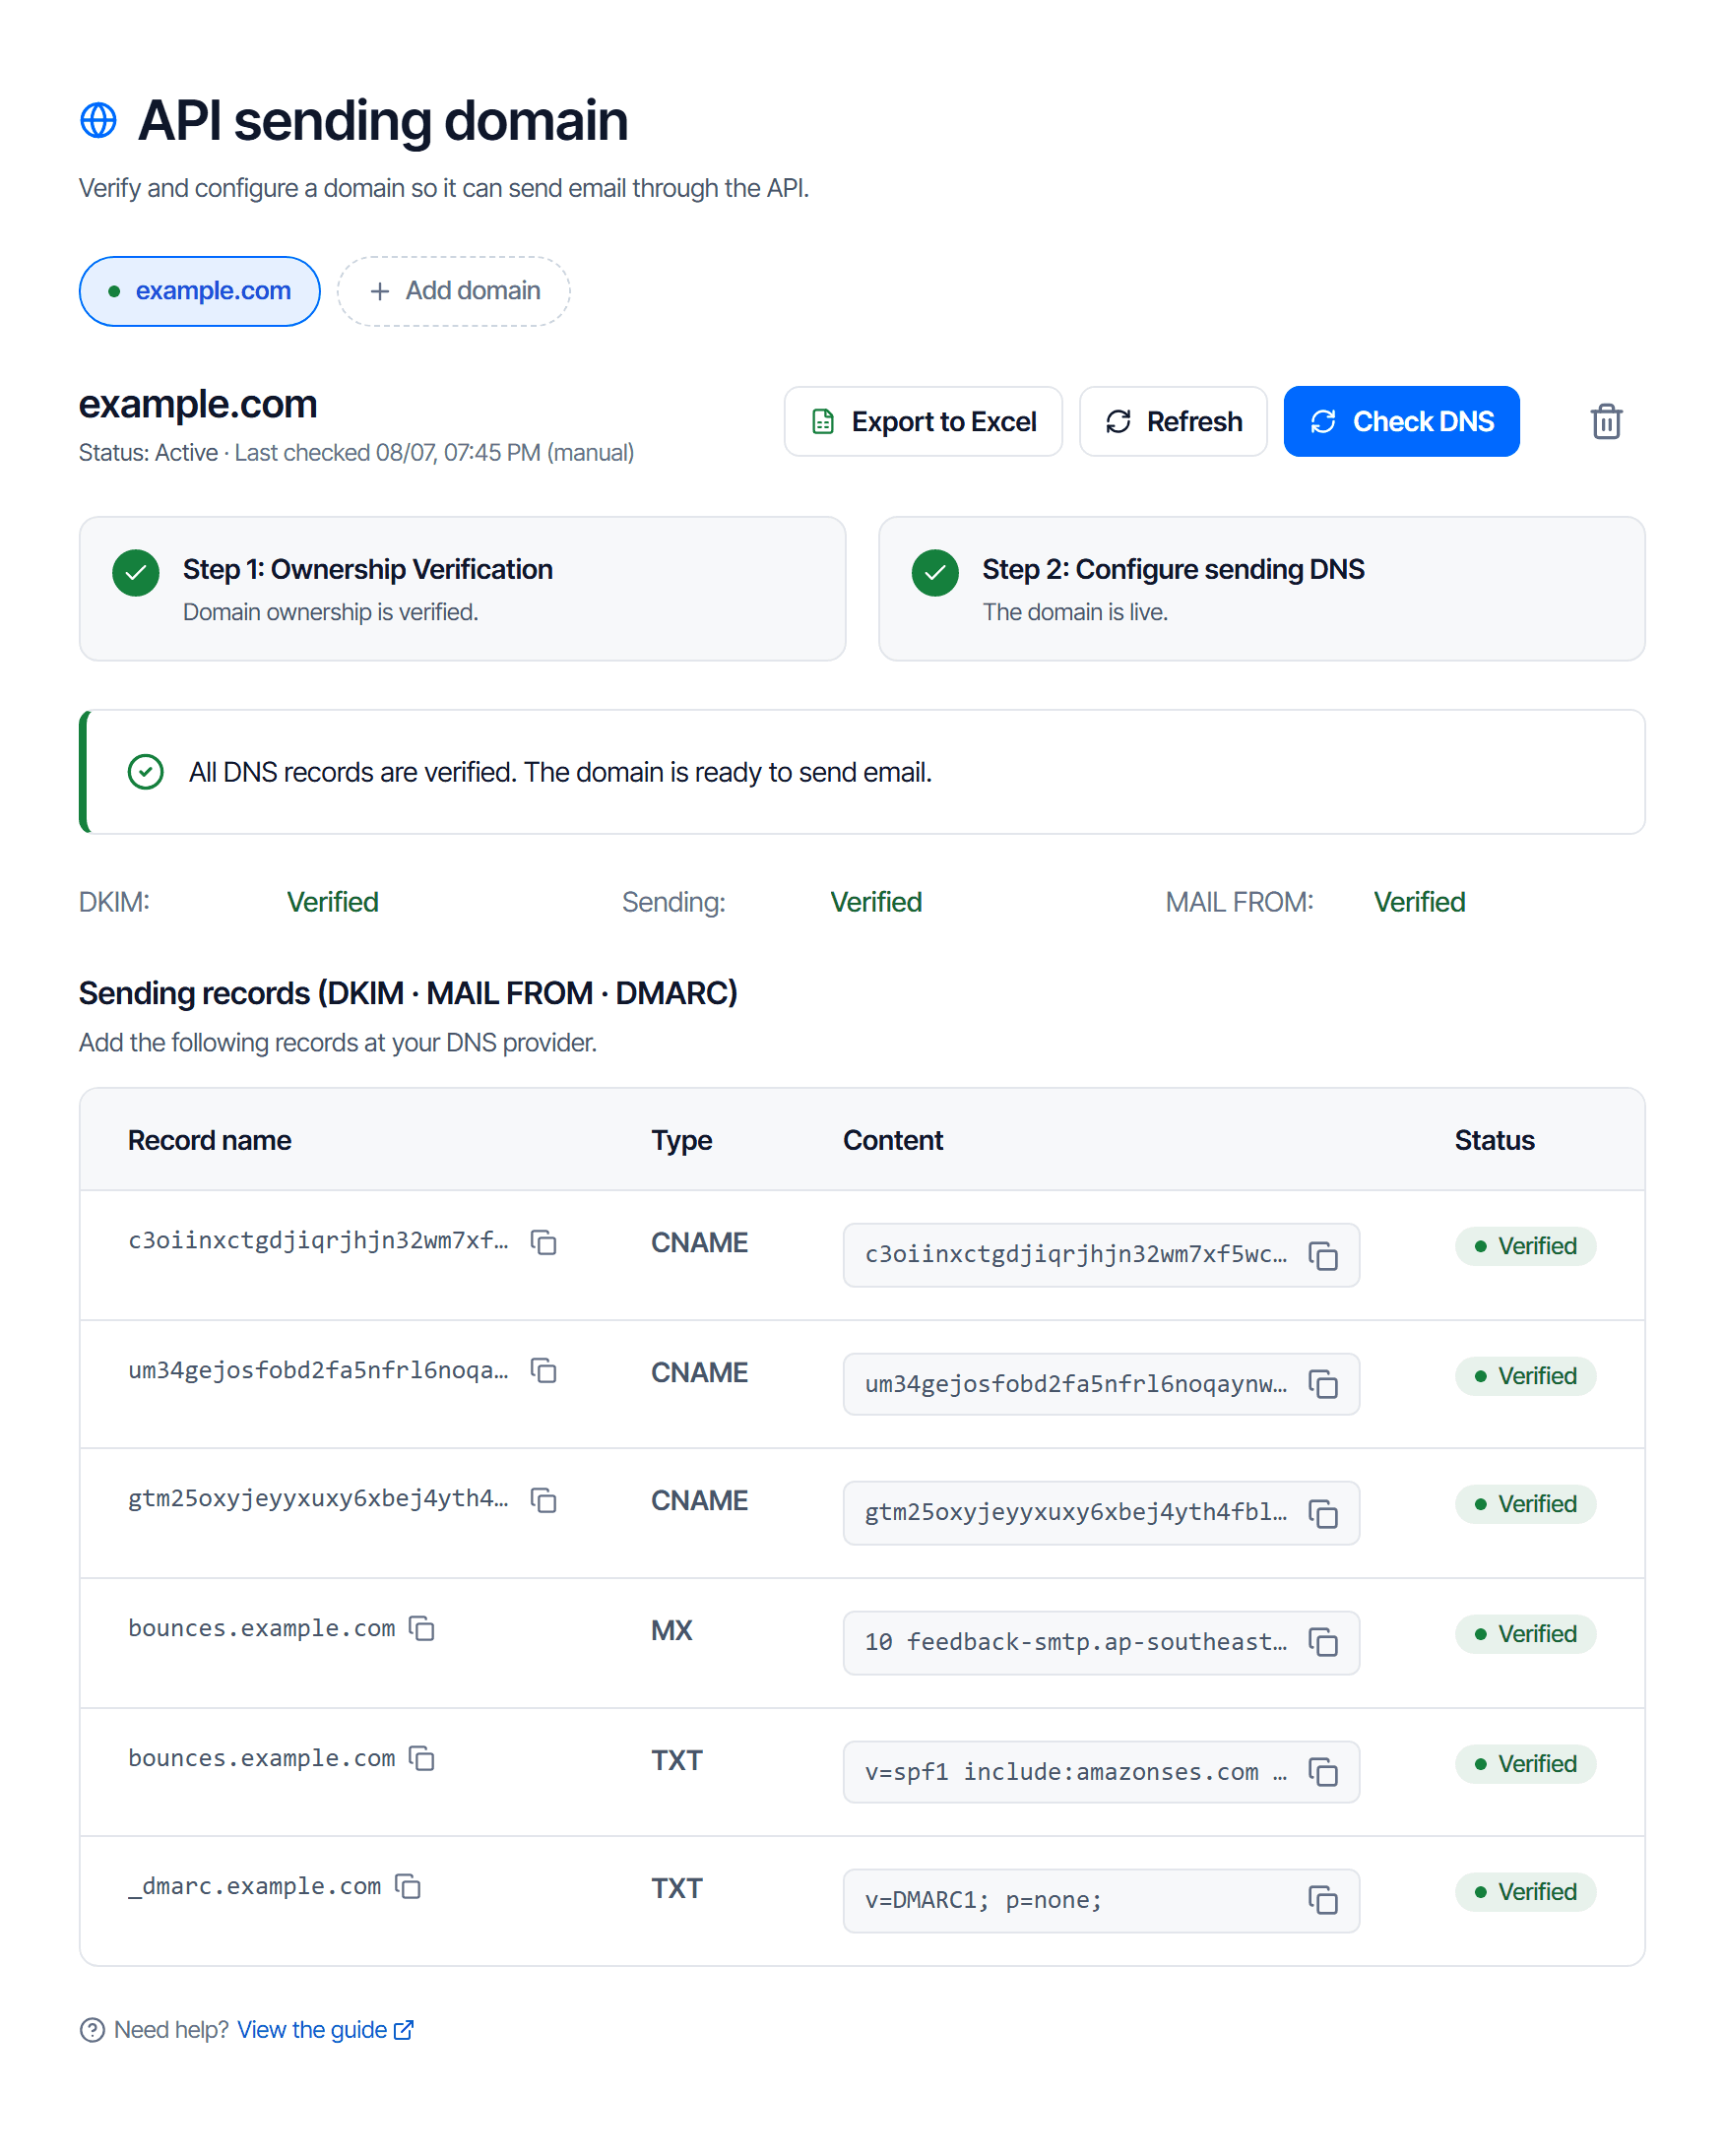
| Group | Type | Sits on | Purpose |
|---|---|---|---|
| Signing | 3 × CNAME | a ..._domainkey subdomain | lets the system sign mail as you |
| Feedback path | MX + TXT | a dedicated subdomain | receives bounce notices and declares a valid sending source |
| Policy | TXT | _dmarc | tells recipients what to do with mail impersonating you |
The routine for each row:
- Copy the record name and content with the copy button, do not type them
- Create the record at your DNS provider, keeping the type
- Leave TTL at its default
The three signing records differ only in their leading token. Publish all three — one missing row means the domain will not activate.
If you already have a _dmarc record, do not add a second one
A domain may have only one _dmarc record. If one exists, keep it and just check it does not
block the new sending source. Adding a second makes both ineffective.
Wait for activation
Click Check DNS, or let the scheduled scan pick it up. Records propagate in minutes, sometimes taking up to 24 hours.
The domain becomes active when every row passes.
Check your work
In the console: the domain in the row switches to the active state, and creating an API key is no longer blocked.
From your own machine, check each row — replace example.com with your real domain:
dig +short TXT _dmarc.example.comFor CNAME and MX rows, query the exact record name in the table. The result must match the
content column.
When a row keeps failing
Work through these in order.
- Your DNS provider appends the domain for you. You enter the full name and it becomes
token._domainkey.example.com.example.com. Check it by eye in the DNS control panel. - A character was lost while copying. Signing strings are long and meaningless; the eye cannot catch the error. Delete the row and copy it again with the copy button.
- An old record is still cached. Wait out the previous record's TTL and check again.
- The wrong record type.
CNAMEentered asTXTis common, because both accept a string.
Send your first email
One HTTP call from nothing to a message received, how to read the response code correctly, and the three mistakes new accounts hit first.
Create an API key
Pick the right key type for each application, save the key at its one and only display, and revoke it properly when it leaks.