Publish the four mail DNS records
Publish MX, SPF, DKIM and DMARC using the exact values the console shows, so your domain can send and receive mail normally.
The last four records before your domain can send and receive mail. The other three services publish a completely different set — do not copy from this page across to them.
Before you configure
- Domain ownership verified — that is step 1; this page is step 2
- Permission to edit DNS records for the domain
Copy from the console, not from this page
MX, SPF and DKIM values differ per domain. They depend on the server cluster assigned to you and on a DKIM key generated for your domain alone. Copying another domain's values will cause inbound mail to be rejected and outbound mail to land in spam.
The four required records
| Record | Answers a receiving server's question | Shape |
|---|---|---|
| MX | Where does mail for this domain go? | Name @, priority 10 |
| SPF | Which machines may send as this domain? | Name @, type TXT, v=spf1 a mx ip4:… ~all |
| DKIM | Was this message altered in transit? | Name <token>._domainkey, type TXT, v=DKIM1; k=rsa; p=… |
| DMARC | What to do when SPF or DKIM fails? | Name _dmarc, type TXT, v=DMARC1; p=none; rua=mailto:… |
Without MX you receive nothing. Without SPF or DKIM your mail lands in spam — the hardest failure to notice, because the console still reports the message as sent.
Publish each record
The general procedure
Work through the Required Configuration Records table one row at a time.
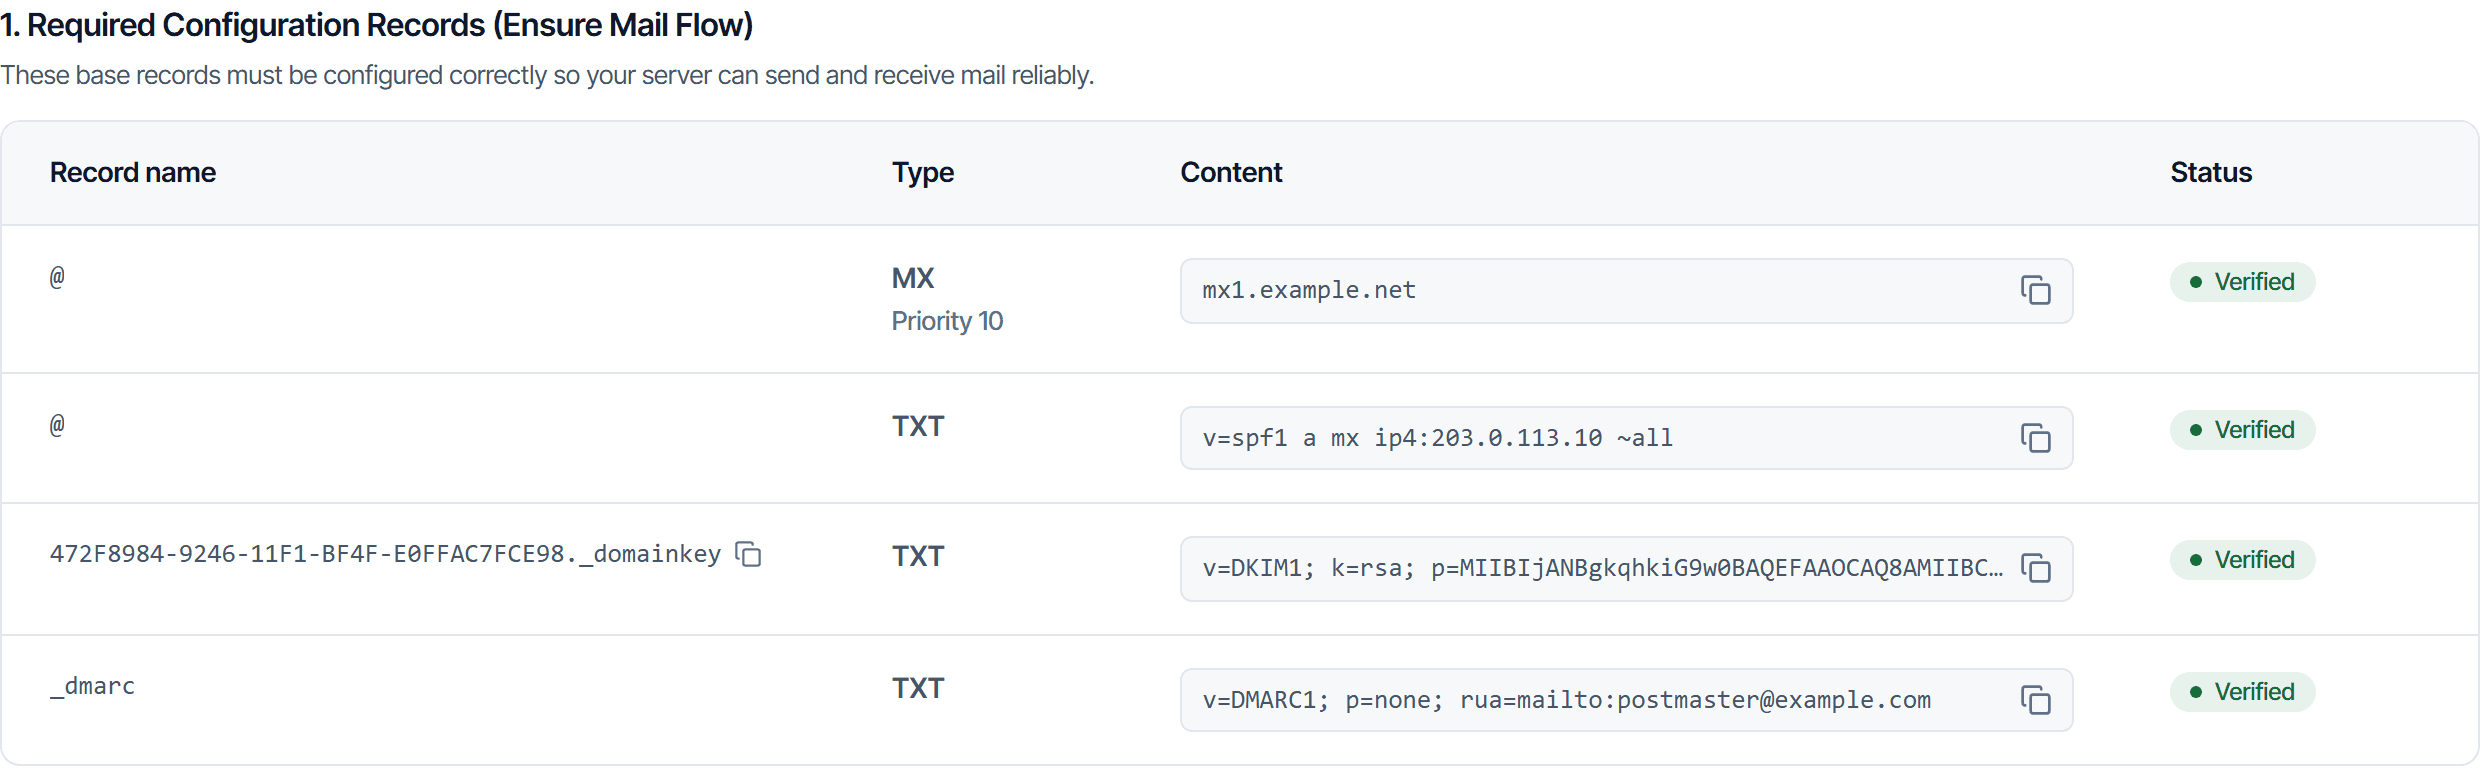
Use the copy button in the Content cell rather than selecting by hand: the DKIM value runs to hundreds of characters and is visually truncated, so a manual selection almost always comes up short.
- Click the copy button in the Content column
- In your DNS control panel, create a new record of the Type the table shows
- Paste into the value field
- Copy the Record name column exactly, including the
@character — it means the domain itself - Leave TTL at default
The DKIM record specifically
The part before ._domainkey is a token generated for your domain, not a fixed word — copy the
whole record name.
The SPF record specifically
A domain may have only one SPF record
If the domain already has a v=spf1 record from another service, do not create a second one. With
two SPF records both stop working, and all your outgoing mail is treated as forged. Merge the
ip4:… part the console shows into the record you already have.
Four optional records for mail apps
The Autodiscovery records table lets mail apps find your server settings automatically, so users
only enter their address and password. You can skip them — users then enter ports and server names
by hand. All four point at smtp.cloudfly.vn.
| Record name | Type | Used for |
|---|---|---|
autodiscover | CNAME | Outlook auto-configuration |
_imaps._tcp | SRV | Receiving over IMAP, port 993 |
_submission._tcp | SRV | Sending, port 587 |
_pop3s._tcp | SRV | Receiving over POP3, port 995 |
Check your work
Click Check DNS on the setup page. Each row shows one of two states:
- Verified — the record is correct
- Wrong — with an Actual line showing the value the platform read
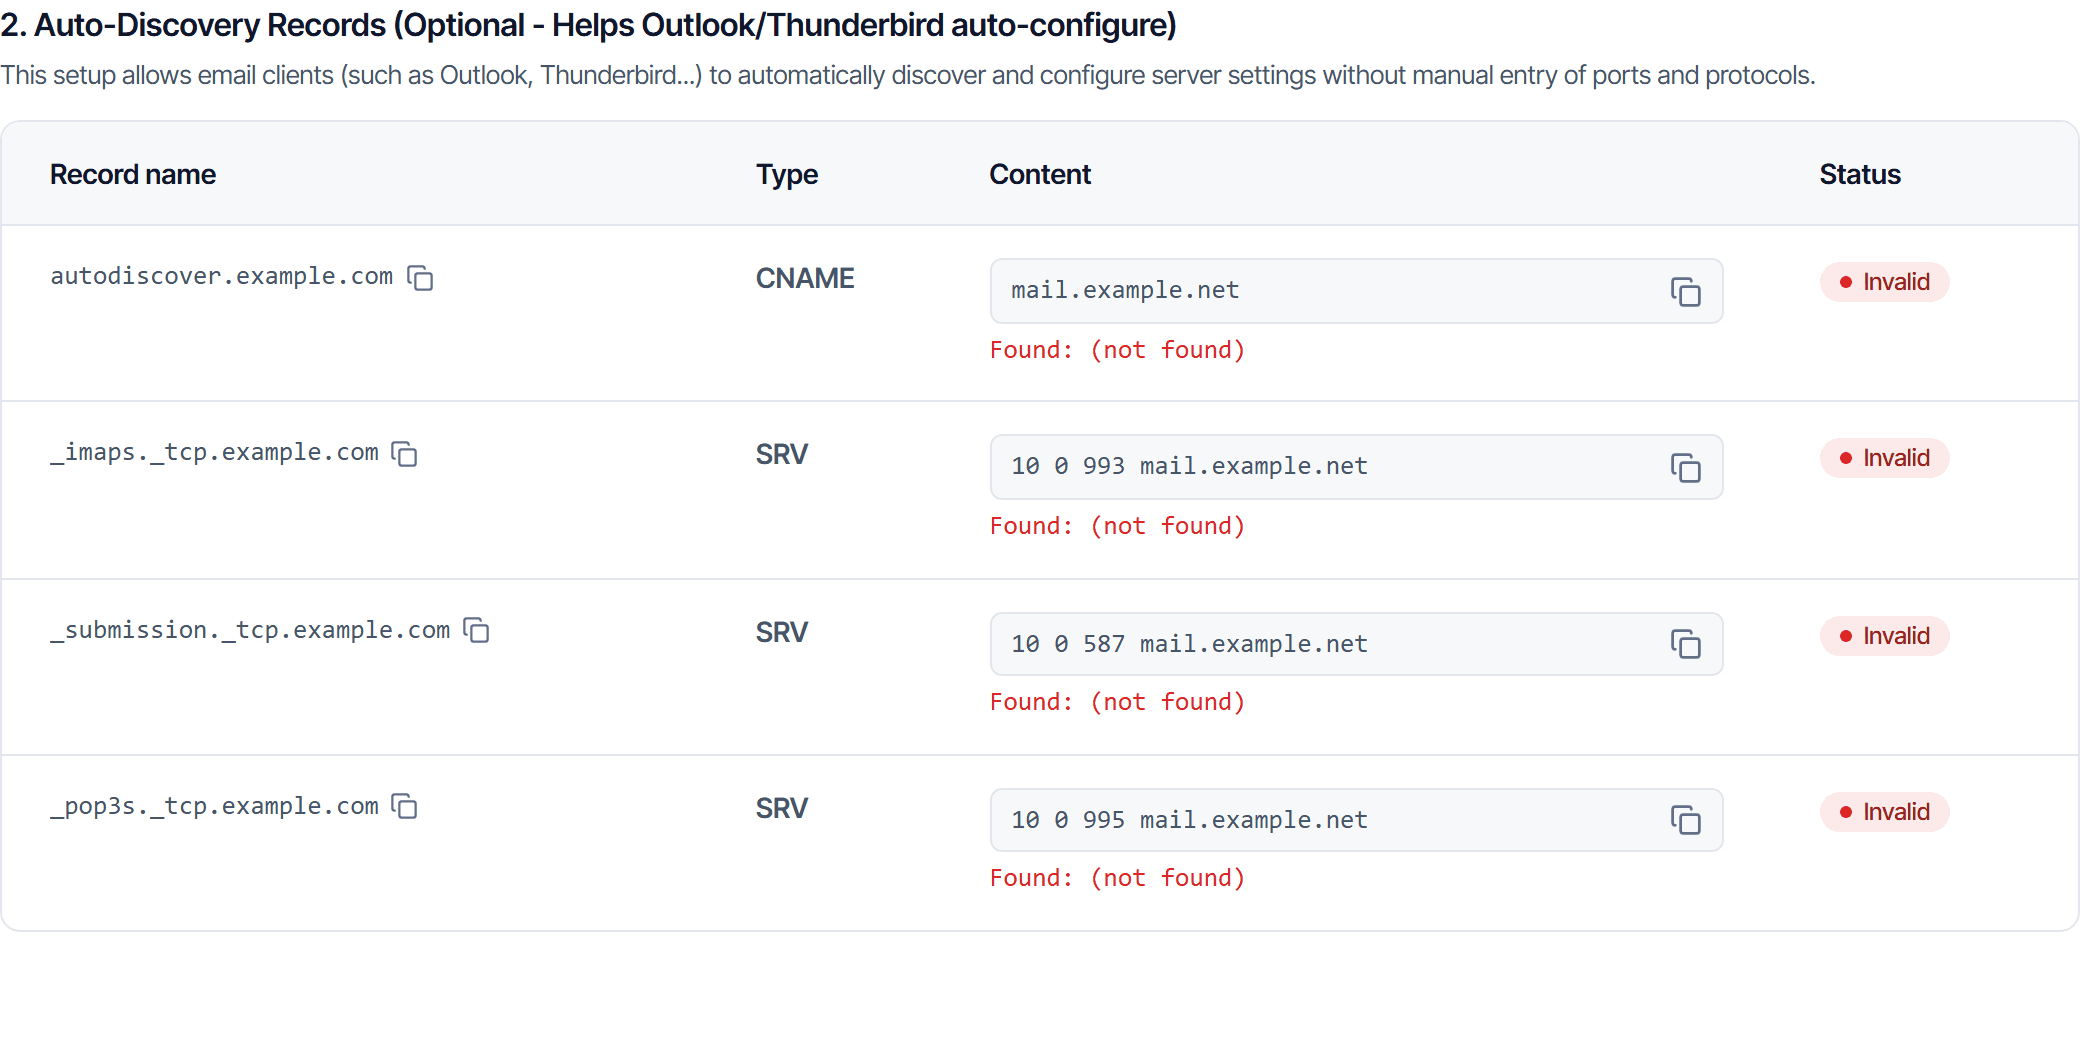
Put the Actual line next to the Content value above it and look for the difference — the fastest way to fix a typo.
(not found) means the record does not exist yet or has not propagated. A record that exists
but holds a wrong value shows that real value instead.
You are done when the Email DNS configuration card reads Mail system ready to use.
When a correct record still reports wrong
Intermediate DNS resolvers still hold the old record in cache. Wait out the previous record's TTL and check again.
About the service
Mailboxes on your own company domain. This page covers what the service includes, the three setup steps in order, and who reads which part.
Create a mailbox
Create a mail account for a colleague, read the three quota figures on the Users page, and fix it when every size option reports over quota.