Receive mail events by webhook
Configure an endpoint so your code knows whether a message arrived or failed, pick the right events, and verify the signature so you cannot be fed fake data.
The send call returns "accepted for sending", not "delivered". Webhooks tell you what happened afterwards, without polling.
Before you start
- A public HTTP address that can receive a
POST, or a chat channel for notifications - You can already send. See Send your first message with Email API
Pick a channel
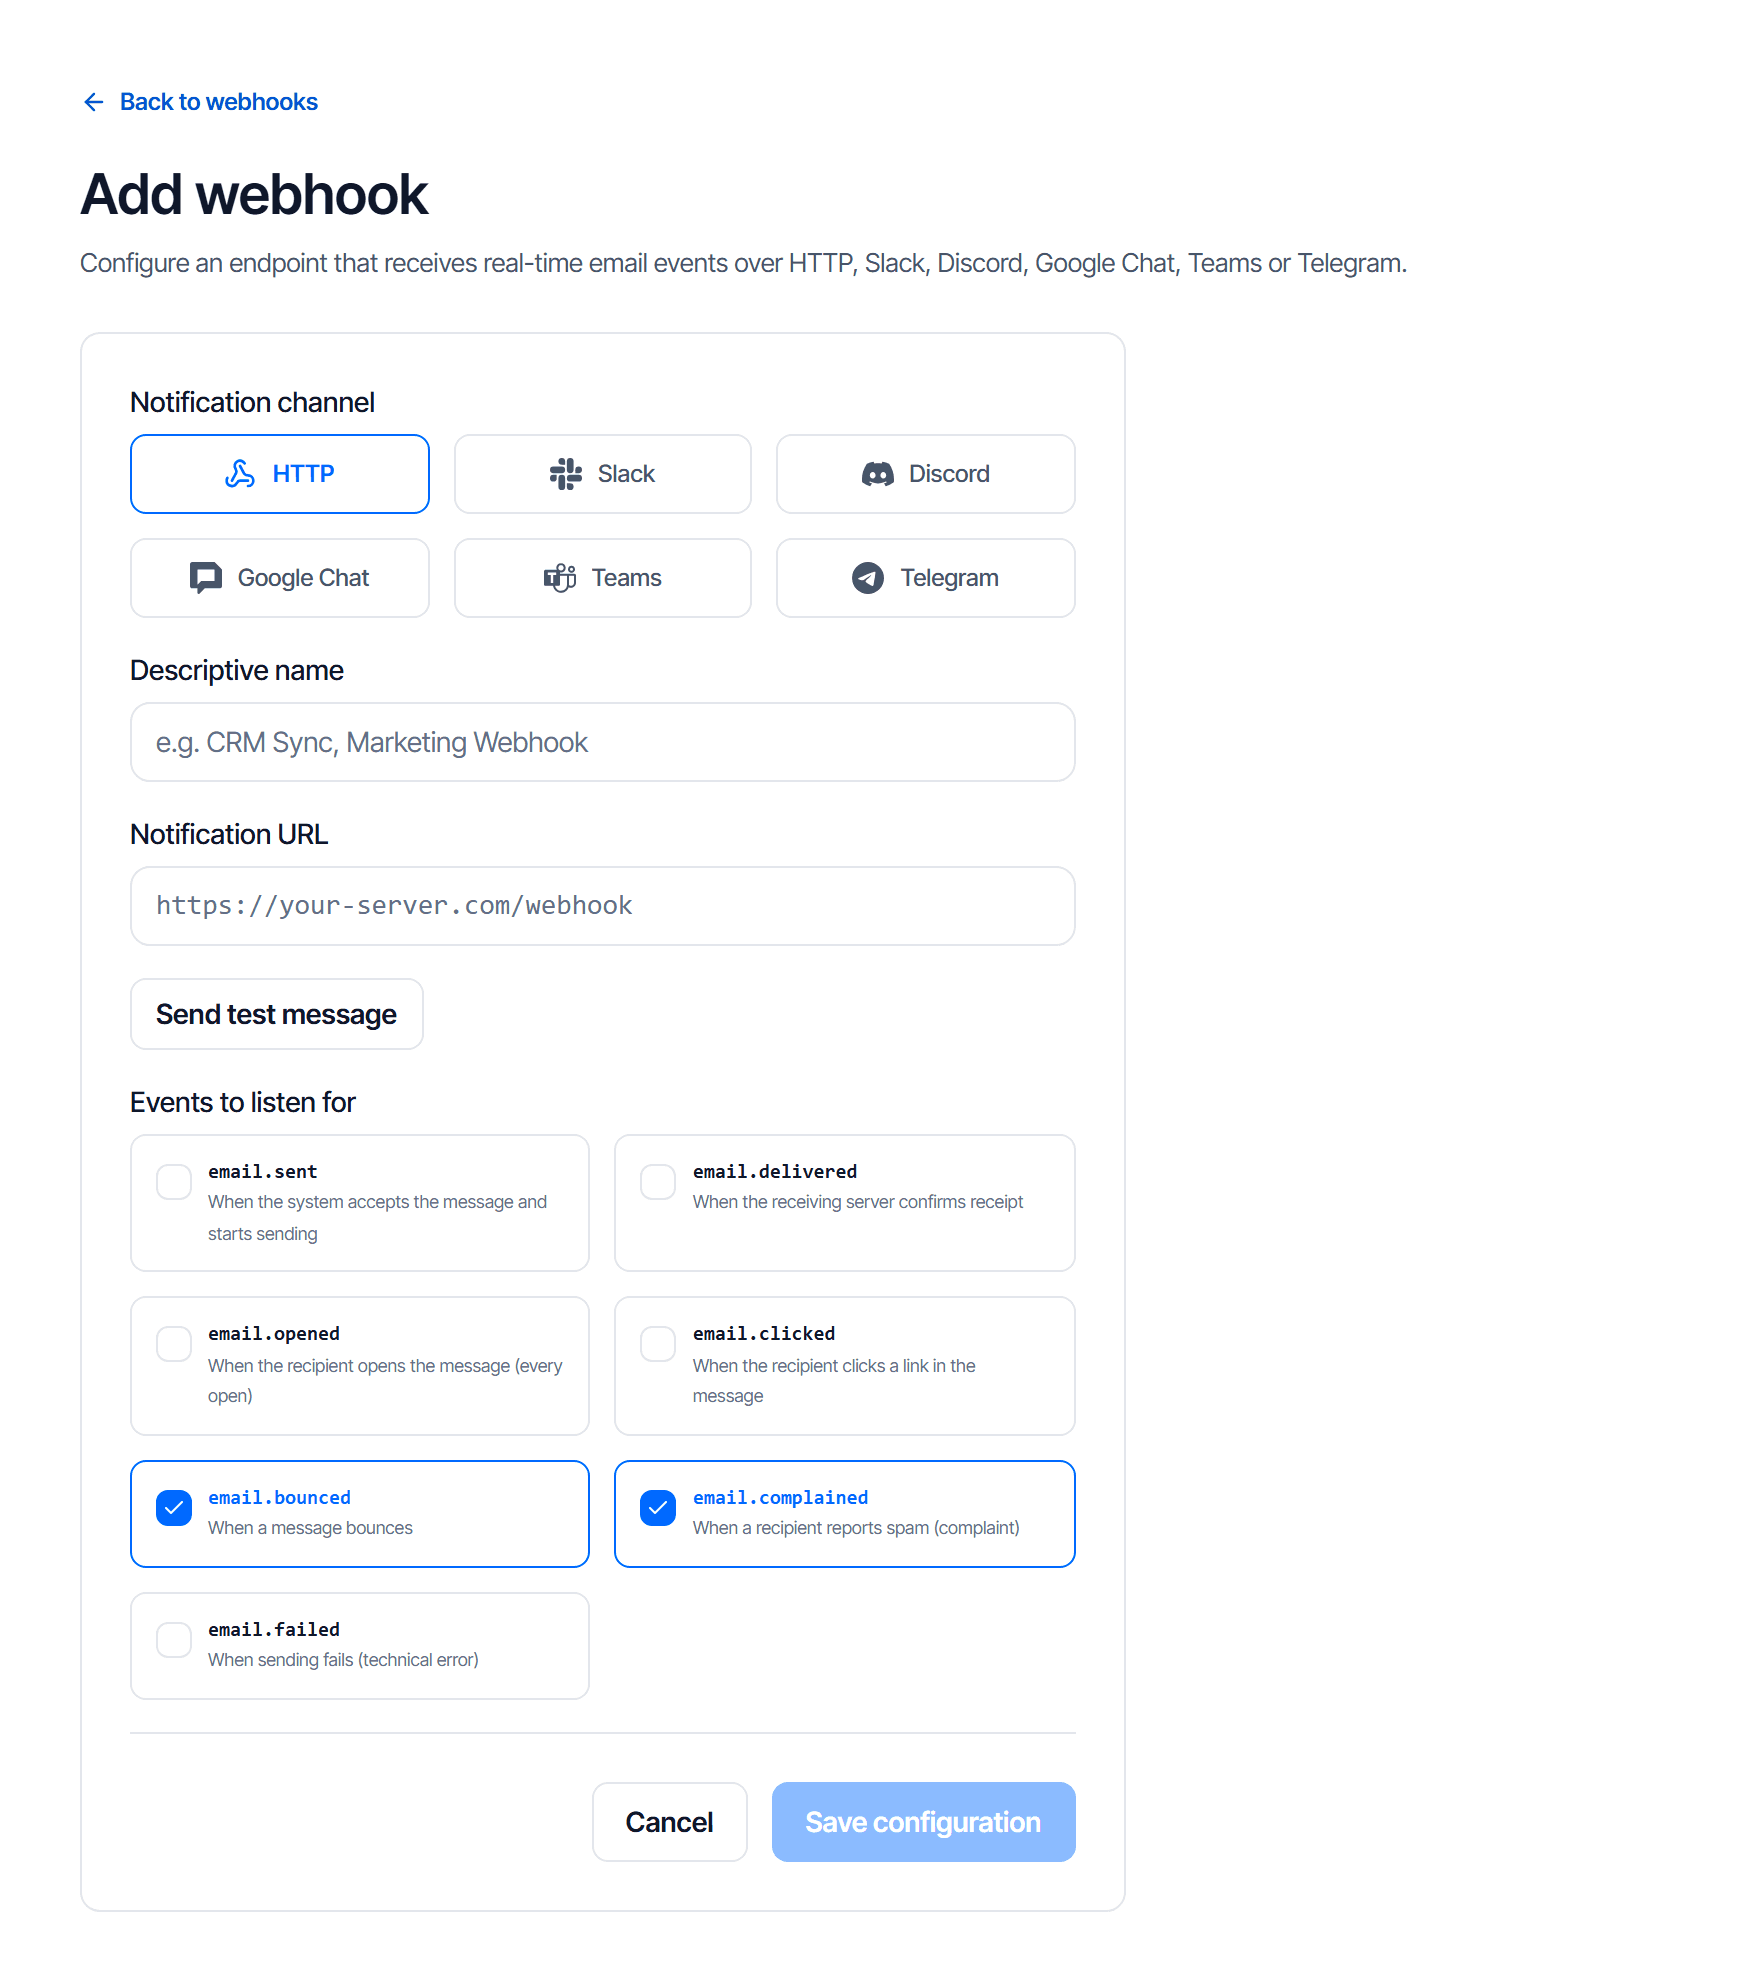
Go to Email API → Webhooks → Add webhook. Besides HTTP it can post straight into common chat channels.
| Channel | Suits |
|---|---|
| HTTP | an application that acts on it — marking addresses bad, stopping retries |
| A team chat channel | people watching, not machines acting |
Chat channels are convenient for alerting but do not replace HTTP: a person will not update your database every time an address goes bad.
Pick the events
There are seven, and you should choose what you will actually handle rather than all of them.
| Event | Fires when | What you should do |
|---|---|---|
email.sent | the system accepts it | usually nothing — you knew from the response |
email.delivered | the recipient reports acceptance | record it, if useful |
email.opened | the recipient opens it — fires on every open | count opens, if useful |
email.clicked | the recipient clicks a link in it — fires on every click | count clicks, if useful |
email.bounced | the message came back | mark the address bad and stop sending |
email.complained | the recipient reported it as spam | stop sending to that address immediately |
email.failed | it could not be sent | read the reason, fix, retry |
email.bounced and email.complained are preselected because they are the two events you must
handle to keep a usable sending reputation.
email.complained is the serious one: continuing to mail someone who reported you as spam damages
the reputation of the whole domain.
Verify the signature
After creation the system shows a secret that appears only once — save it like an API key. Editing a webhook later does not change it.
The secret verifies the signature in the X-CloudFly-Signature header. Your endpoint must check
it before trusting the payload.
The webhook address is public
Without signature checking, anyone who knows it can send fake email.bounced events, and your
application will happily mark working customer addresses as dead.
Write the endpoint properly
Three things the system expects:
- Respond quickly. Return
2xxwithin 10 seconds; heavy work goes on a queue, answer first. - Tolerate duplicates. An event can arrive more than once, for example after Replay. Key on
email_id+type(addtimestampforemail.opened/email.clicked). - No automatic resends. Each event is sent once; a non-
2xxcode, a reply slower than 10 seconds or a redirect is logged as an error.
Monitor and debug
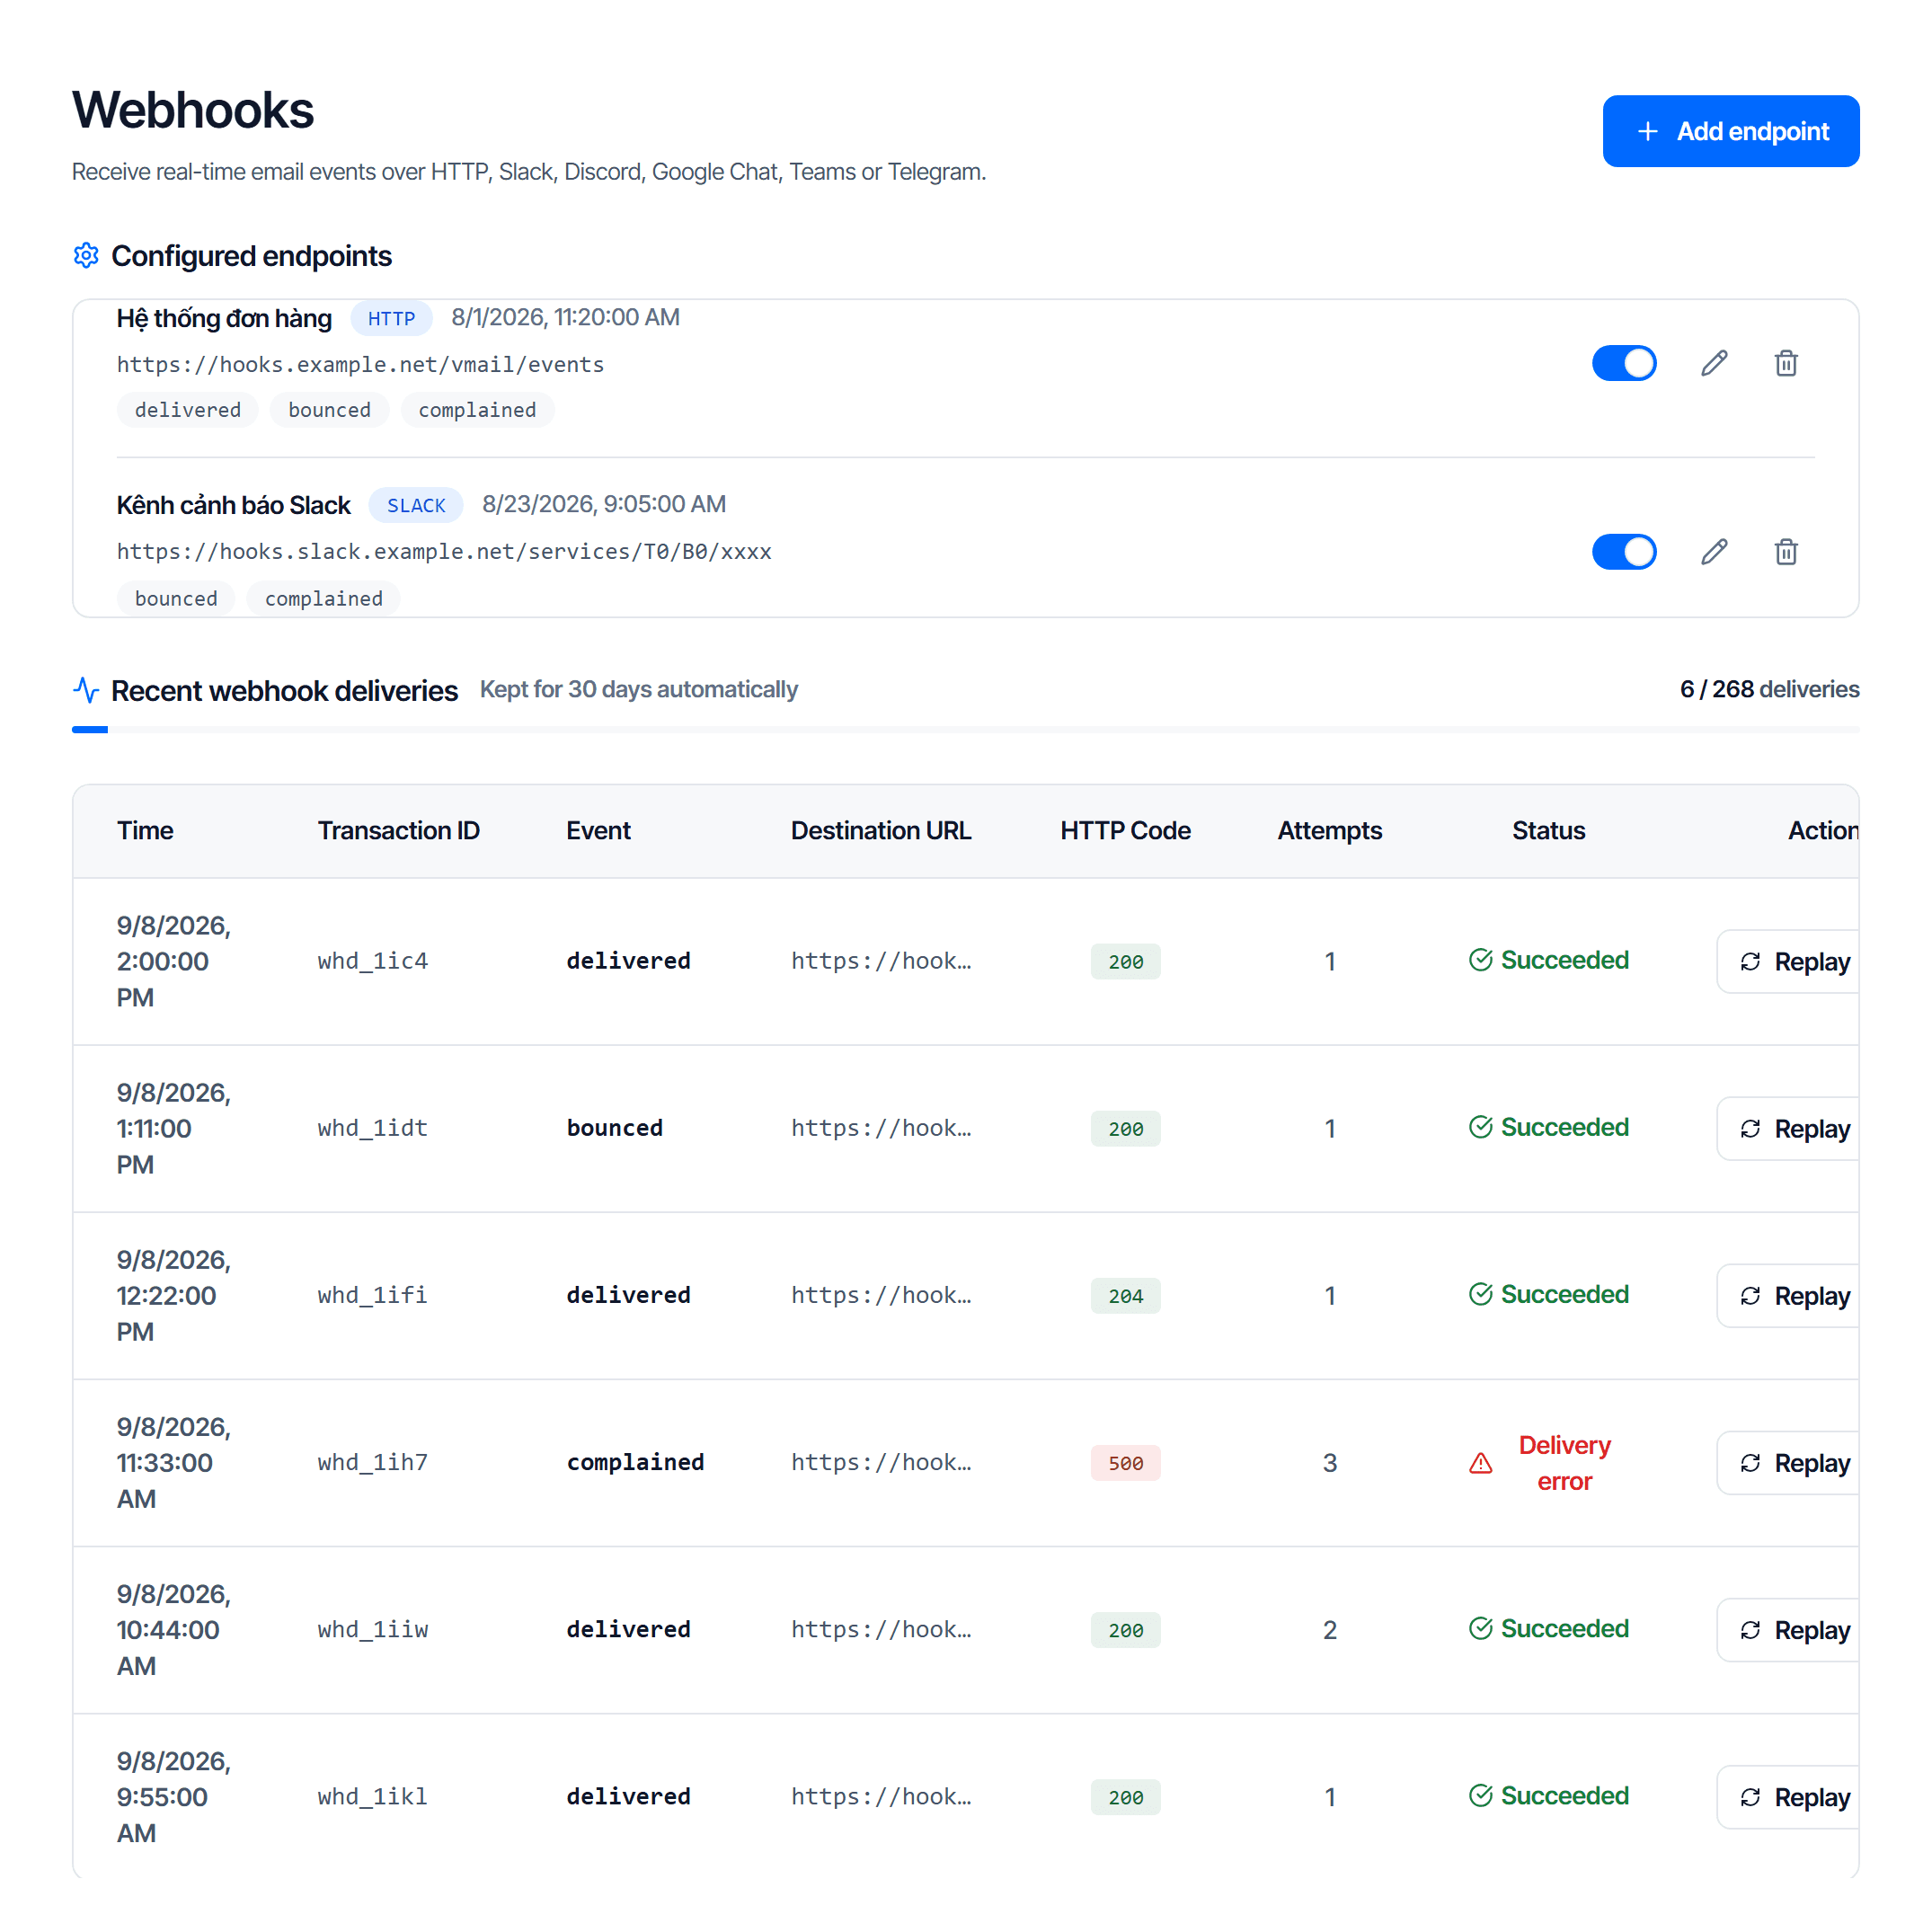
The webhook page has a delivery history with transaction id, destination URL and attempts columns. History is kept for 30 days.
| Symptom | Usual cause |
|---|---|
| A row shows Delivery error | your endpoint returned a non-2xx code, took longer than 10 seconds or could not be reached — fix it, then click Replay on that row |
| Attempts above 1 on a row | someone clicked Replay on it — each click adds 1; the system never retries on its own |
| No history at all | no event of the type you selected has happened yet |
| Endpoint paused | use the activate button to switch it back on |
Pausing means missing events
The pause button stops delivery without deleting the configuration or the secret, but events that happen while the endpoint is paused are neither saved nor delivered later. If you still need the events while you fix the receiving system, leave the endpoint running and click Replay on the failed rows once it is fixed.
Check your work
- Send a message to an address you know does not exist on a domain you control
- Wait a few minutes
- Your endpoint receives
email.bounced, and the delivery history shows a successful row - That address appears in the suppression list
Step 4 is the cross-check that the system and your application are looking at the same truth.